

Small mats can be combed out at home if the mat is loose enough to slip a finger underneath and your cat stays calm throughout. Hold the skin firmly at the base of the mat, start working from the very tips of the tangled hair, and move slowly toward the skin in short strokes. Stop immediately if the mat won’t budge, if your cat flinches or hisses, or if you can’t fit a fingertip under the mat.
Quick home removal steps:
- Find the mat and test it: slide one finger under it. If you can’t, stop here and call a groomer.
- Hold the skin at the mat’s base with your free hand to prevent pulling.
- Work a wide-tooth metal comb through the outer ends of the mat first, teasing hair loose in small sections.
- Finish with a fine-tooth comb once the mat breaks apart.
Safety callout: Never use scissors at home. Mats pull skin upward and hide it from view, making accidental deep cuts far more likely than you’d expect. If the mat is tight against the skin or your cat is showing signs of pain, Ask a Cat Groomer confirms this is the threshold where professional help is the right call.
Key Takeaways
Safe cat mat removal starts at home for small, loose mats but requires a professional groomer or vet the moment a mat is larger than a nickel, tight against the skin, or causing the cat distress.
| Point | Details |
|---|---|
| The nickel-size rule | Only attempt home removal if the mat is small and a finger fits underneath it. |
| Hold the skin first | Pinch the skin at the mat’s base before every comb stroke to prevent painful pulling. |
| Work from the ends in | Start at the outer tips of the mat, not the base, and work inward in layers. |
| Scissors are never safe at home | Mats hide skin; scissors cause deep lacerations even with careful hands. |
| Petbite for professional care | Petbite’s certified groomers handle severe mats, skin checks, and stress-minimizing removal when home tools aren’t enough. |
Table of Contents
- What tools do you actually need for cat mat removal?
- How to comb out a small mat, step by step
- When should you stop and see a professional groomer or vet?
- Why scissors at home are genuinely dangerous
- How to calm a resistant or anxious cat before grooming
- How to prevent mats by coat type
- What to do after you remove a mat
- When matting signals a health problem: a quick checklist
- Grooming as bonding, not a chore
- Petbite’s professional grooming service handles what home tools can’t
- Sources
What tools do you actually need for cat mat removal?
Getting the right tools matters more than technique. The wrong tool, or a product formulated for dogs or humans, can hurt your cat or make the mat worse.
Recommended tools and what each one does:
- Wide-tooth metal comb: The starting point for any mat work. Metal teeth glide through tangled hair without generating static, and the wide spacing lets you work through the outer layers without yanking.
- Slicker brush with soft, flexible bristles: Good for finishing after a mat breaks apart and for daily maintenance to catch tangles before they become mats. The JW GripSoft Slicker Brush for Cats is a solid everyday option for long-haired cats.
- Mat comb or mat splitter: These tools have spaced blades designed to divide a mat into smaller sections. They can help with mild-to-moderate tangles but require a careful hand. As PetMD notes, mat splitters and undercoat combs should ideally be used by experienced hands because improper use can injure the cat.
- Fine-tooth comb: The finishing tool. Once the mat is broken up, run this through to catch any remaining tangles and check that the coat is fully clear.
- Clippers: For professional use only at home. A groomer uses veterinary-grade clippers with temperature-controlled blades; standard human clippers overheat quickly and can burn skin.
- JW GripSoft Cat Comb: A practical wide-and-fine combo comb that covers both the initial detangling pass and the finishing step.
What to avoid:
- Scissors, seam rippers, or any blade tool
- Dog shampoos, conditioners, or detanglers not labeled for cats. PetMD warns that many dog and human products contain ingredients that are unsafe for cats when ingested during normal grooming behavior.
- Undercoat rakes with aggressive, closely spaced teeth on a matted coat
- Human clippers, which overheat and lack the precision of grooming-grade equipment
Pro Tip: For short-haired cats, a rubber grooming tool like the Kong ZoomGroom for Cats works well for loose hair and light tangles. Long-haired cats need a metal wide-tooth comb as their primary tool. Before any clipper session, press the blade against your wrist for three seconds — if it feels warm, it’s already too hot for skin contact.
How to comb out a small mat, step by step
Before you start, do a quick severity check. Can you slide at least one fingertip under the mat? Is it roughly nickel-sized or smaller? Is the coat completely dry? If all three answers are yes, you can proceed. Purina advises never to bathe a matted cat before attempting removal because wet hair causes the keratin to swell, which tightens the mat and makes combing far harder.
Gather your tools, pick a quiet room, and wait until your cat is relaxed, ideally after a meal or a nap.
Step-by-step procedure:
- Secure your cat gently. Place them on a non-slip surface. If they’re calm, no restraint is needed. If they’re fidgety, a light towel wrap around the body (leaving the head free) helps.
- Hold the skin at the mat’s base. Pinch the skin firmly between your thumb and forefinger, directly below the mat. This is the single most important step: it prevents the comb from pulling the skin when you work.
- Start at the very tips of the tangled hair. Insert the wide-tooth comb into the outermost edge of the mat, not the base. Work in short, confident strokes outward, freeing the loose outer hairs first.
- Work in layers toward the base. Once the outer hairs are free, move slightly deeper into the mat and repeat. Think of it as peeling an onion from the outside in.
- Apply a cat-safe detangler if needed. A small amount on the mat can help loosen the fibers. Use only products labeled for cats. According to Ask a Cat Groomer, for very small, loose mats, a quick confident tug with the comb often works better than slow, repeated picking, which tends to cause more pain and stress.
- Finish with a fine-tooth comb. Once the mat breaks apart, run the fine-tooth comb through the area to catch any remaining tangles and confirm the coat is clear.
- Reward immediately. Give a treat the moment the session ends, even if you only made partial progress.
Stop and call a groomer if any of these apply:
- The mat doesn’t loosen after several gentle attempts
- Your cat flinches, hisses, growls, or makes a sudden movement
- You see redness, raw skin, or any discharge under the mat
- The mat is tight enough that you can’t maintain your skin-hold grip
- The mat is in a sensitive area: near the face, genitals, or armpits
Mats are not just tangled hair. Ask a Cat Groomer explains that dense mats are consolidated masses of dead hair, sebum, and debris that interlock and abrade the skin. Once a mat reaches that density, no spray or brush will break it down. Clippers are the only safe option, and that means a professional.
A practical severity scale to self-assess: fine (a few tangled hairs, comb slides through easily), moderate (a small clump, finger fits under it), severe (tight against skin, no finger fits), full matted (multiple mats, coat feels like a shell). Home removal is only appropriate for less severe mats. AvailPet’s vet guide uses this same framework to help owners decide when to stop.
When should you stop and see a professional groomer or vet?
Some mats are simply beyond safe home handling, and trying to push through them causes more harm than the mat itself.
Go straight to a professional if:
- The mat is larger than a nickel
- You cannot fit a fingertip under the mat
- There are multiple mats across the body
- The mat is near the face, genitals, or armpits
- You notice skin odor, discharge, or visible irritation under the mat
- Your cat is in obvious pain, not eating, or unusually lethargic
- The mat has been present for more than a week without improvement
A professional groomer will assess mat severity, skin condition, and your cat’s temperament before deciding on an approach. Petful explains that groomers weigh all three factors together: a cat with severe mats and a calm temperament may be clipped without sedation, while an anxious cat with the same mats may need veterinary sedation for safety. In the most severe cases, a full-body shave under sedation is the only option that avoids injuring the cat or the groomer.
A veterinarian becomes the right call when there’s any sign of skin infection, the cat is in pain, or the matting is so extensive that sedation is likely needed. Vets can also treat any wounds or infections discovered under the mat.
What to bring and ask at the appointment:
- Your cat’s medical history and any known skin sensitivities
- A note on how long the mats have been present and any home attempts
- Ask whether sedation is part of their protocol and what the aftercare instructions are
- Ask whether a skin check is included and whether they’ll flag any concerning findings
Typical U.S. cost range: Professional mat removal or a full shave-down generally runs $50–$150 depending on the severity, the cat’s size, and your region. Sedated grooming at a veterinary clinic costs more, often $200–$400 or higher when anesthesia and monitoring are included. Most groomers can see a cat within a few days; veterinary sedation appointments may require a week or more of lead time.
Why scissors at home are genuinely dangerous
The risk isn’t theoretical. Mats pull the skin upward and hold it there, which means the skin is often directly against the underside of the mat, invisible from above. When you insert scissors into that space, you’re cutting blind.
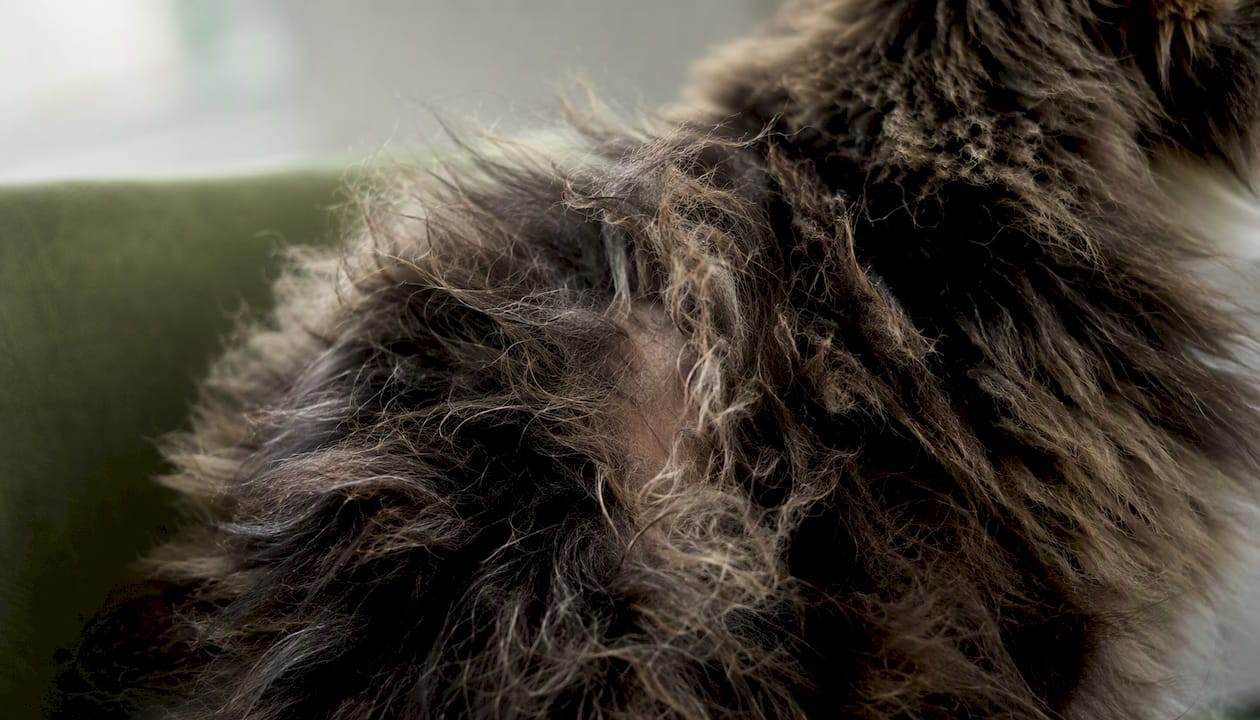
Ask a Cat Groomer explicitly discourages scissors for home mat removal precisely because mats hide skin and scissors are a common cause of deep, painful lacerations that require veterinary repair. A cut that looks minor on the surface can be deep enough to need sutures, and cats’ skin is thin enough that even a careful snip can go wrong fast.
The same logic applies to seam rippers, razor combs, and any other blade tool not designed for professional grooming. If you’re at the point where you’re thinking about cutting, that’s the signal to stop and call a groomer or vet instead.
A short list of what not to do:
- No scissors, ever, for home mat removal
- No seam rippers or craft blades
- No human hair clippers, which overheat and lack precision
- No bathing the cat first. Wet hair tightens mats and makes the situation worse, as Purina confirms
- No forcing the session if your cat is distressed. A stressed cat moves unpredictably, which is exactly when accidental cuts happen
How to calm a resistant or anxious cat before grooming
A cat that’s already stressed will make mat removal harder and riskier. The goal before you even pick up a comb is to get your cat into a relaxed, cooperative state.
Setup and environment:
- Choose a quiet room with no other pets present
- Use familiar bedding or a towel your cat already sleeps on
- Run a Feliway diffuser in the room for 20–30 minutes before the session. Synthetic feline pheromones reduce anxiety in many cats, though individual responses vary
- Keep sessions short: 5 minutes is enough for a first attempt. Stop before the cat gets frustrated, not after
Desensitization over time:
- Start with touch only. Pet the areas near the mat without any tools for a few days
- Introduce the comb by letting the cat sniff it, then resting it on their back without combing
- Progress to short brush strokes on non-matted areas, paired with high-value treats
- Only attempt the mat itself once the cat is comfortable with the comb in general
Orchard Road Animal Hospital recommends short, reward-based grooming sessions specifically because they build tolerance over time, which makes every future session easier.
For aggressive or highly stressed cats:
- Stop the session entirely. Forcing it risks injury to both the cat and you.
- Try again the next day after a meal, when the cat is naturally calmer
- If the cat is consistently aggressive during grooming, consult your vet. Some cats need a mild anti-anxiety medication before grooming, and that’s a legitimate medical tool, not a failure
Pro Tip: Schedule grooming during the quietest part of your cat’s day, usually mid-morning or early afternoon, not right after play or right before feeding when energy and anticipation are high. Pair every session with a specific high-value treat the cat only gets during grooming, like a small piece of freeze-dried salmon. The association builds faster than most owners expect.
How to prevent mats by coat type
Prevention is far easier than removal. A consistent brushing routine, matched to your cat’s coat, keeps mats from forming in the first place.
Brushing frequency and tool choices:
| Coat type | Frequency | Best tool | Time per session |
|---|---|---|---|
| Short-haired adult | Once a week | Rubber grooming tool or soft slicker brush | 5 minutes |
| Long-haired adult | Daily | Wide-tooth metal comb, then slicker brush | 5 minutes or less |
| Senior or overweight cat | Every 2–3 days regardless of coat | Soft slicker brush, gentle comb | 5 minutes or less |
| Kitten (any coat) | 2–3 times per week | Soft bristle brush | 3–5 minutes |
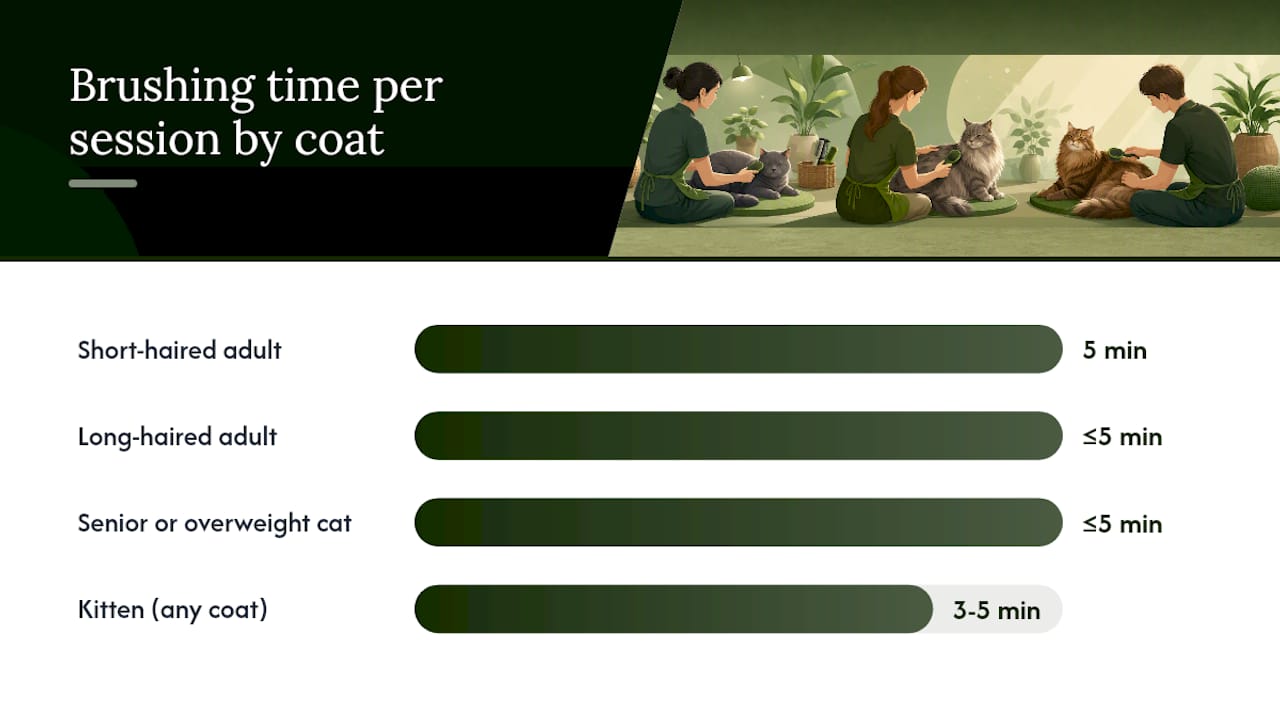
The ASPCA recommends regular brushing by coat type to prevent mats, and notes that neglect can lead to skin issues and hairball problems. Long-haired cats often need daily grooming to stay mat-free. A JW GripSoft Cat Brush works well as a daily maintenance tool for most coat types.
Health and environment factors that increase mat risk:
- Weight gain or obesity: Overweight cats can’t reach parts of their body to self-groom, so mats form in the spots they can’t access, typically the lower back, belly, and tail base.
- Arthritis or joint pain: Painful joints limit grooming range. If your senior cat is suddenly developing mats in areas they used to keep clean, arthritis is a common cause.
- Flea infestations: Scratching and biting at flea sites creates tangles that quickly mat.
- Poor diet: Coat quality reflects nutrition. A diet low in omega fatty acids produces drier, more tangle-prone hair.
For owners managing health conditions that make regular grooming difficult, resources like this guide on pet care during chronic illness offer practical strategies for keeping up with a grooming routine.
Tangle-prone zones to check every week:
- Behind the ears
- Underarms (where the front legs meet the chest)
- Belly and groin
- Tail base
- Collar area if your cat wears one
What to do after you remove a mat
The mat is out, but the job isn’t quite done. The skin under a mat has been compressed, possibly irritated, and cut off from air circulation. A quick check takes two minutes and can catch a problem before it becomes a vet visit.
Skin inspection steps:
- Part the hair and look directly at the skin where the mat was
- Check for redness, rawness, swelling, or any wet or crusty discharge
- Note any odor, which can indicate bacterial or yeast overgrowth
- Gently press around the area to check for sensitivity or heat
Purina notes that brushing and combing sessions are also opportunities to check for parasites, wounds, and skin problems, and that owners should inspect the skin under mats when they’re removed.
For minor redness or irritation:
- Keep the area clean and dry
- Use only cat-formulated soothing products if needed. Never apply human antiseptic creams, dog-only products, or anything containing tea tree oil, which is toxic to cats
- Monitor the spot daily for 3–5 days
Call your vet if you see:
- Pus or any discharge that isn’t clear
- Skin that looks broken, raw, or ulcerated
- Persistent redness or swelling after 48 hours
- Your cat licking or biting the area obsessively
- Lethargy, fever, or decreased appetite alongside skin changes
These signs point to a skin infection that needs medical treatment, not home care.
When matting signals a health problem: a quick checklist
Recurring mats, especially in a cat that used to keep itself clean, are often a symptom rather than just a grooming problem. Orchard Road Animal Hospital identifies failure to self-groom as a frequent sign of underlying issues including arthritis, obesity, and dental disease. VCA Hospitals reinforces this point: when a cat stops grooming itself, it’s often a red flag for health decline that warrants veterinary evaluation.
Red-flag symptoms to watch for:
- Sudden increase in mat frequency in a previously well-groomed cat
- Weight gain alongside reduced grooming
- Stiffness, reluctance to jump, or visible discomfort when touched near the spine or hips
- Bad breath or drooling (dental disease limits grooming because mouth pain makes licking uncomfortable)
- Behavioral changes: hiding, reduced appetite, less interaction
Action plan if you notice these signs:
- Photograph the mats and any skin changes before the appointment
- Note when the matting started and whether anything changed around that time (diet, environment, activity level)
- Call your vet and describe the red flags specifically, not just “my cat has mats”
- Ask whether a grooming appointment should happen before or after the vet visit, since a vet may want to examine the skin in its current state
For seniors or owners who need help arranging both veterinary and grooming care, the pet care resources for seniors guide covers practical support options.
Pro Tip: Keep a simple photo log of your cat’s coat condition once a month. A side-by-side comparison over three months makes it much easier to spot gradual changes that are easy to miss day to day.
Grooming as bonding, not a chore
Most cats that hate being groomed learned that association early, usually from a session that went too long, hurt, or felt like a fight. That’s worth reframing.
A five-minute session with a soft brush, a few treats, and no agenda beyond getting the cat comfortable with being touched is genuinely useful, even if you never reach a mat. The physical contact builds trust. The routine builds tolerance. Over weeks, a cat that used to bolt at the sight of a comb will often stay put, sometimes even lean into the brush.
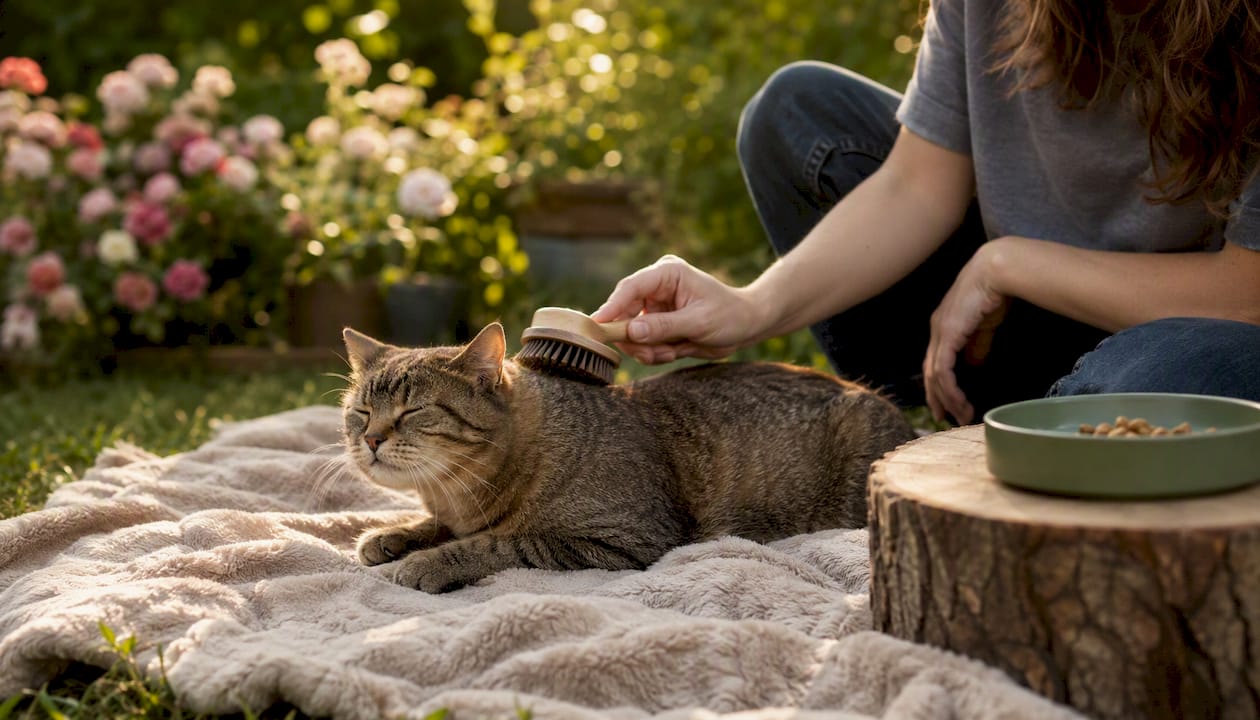
Try this once this week: sit with your cat after a meal, run a soft brush lightly over their back for two minutes, give a treat, and stop. No mats, no agenda. Just the routine. That’s the foundation everything else is built on.
Petbite’s professional grooming service handles what home tools can’t
When a mat is beyond the nickel-size threshold, tight against the skin, or your cat is too stressed to sit still, home tools aren’t the right answer. That’s where Petbite’s certified groomers come in.

Petbite’s grooming service is built around stress-minimizing protocols, which matters because a calm cat is a safer cat to work on. For severe mats, the team uses professional-grade clippers and, when necessary, coordinates sedated shaves for cases where forcing a session would cause harm. Every appointment includes a skin check, so any irritation or infection hiding under a mat gets flagged on the spot. With over 500 animals groomed and a 5-star average rating, Petbite brings the kind of hands-on experience that makes a real difference for cats that have had difficult grooming histories.
If your cat’s mats are past what a comb can handle at home, or if you’re simply not confident about the process, book a professional grooming session at Petbite and let a certified groomer take it from there.
Sources
The following sources informed the safety thresholds, technique guidance, and health context in this guide. For any medical concerns about your cat’s skin or grooming behavior, consult your veterinarian directly.
- How to Remove Cat Mats — Ask a Cat Groomer
- Cat matted fur: How often to brush — Purina
- Cat grooming tips — ASPCA
- How To Remove Matted Cat Hair - Petful
This article is general information, not a substitute for advice from a qualified doctor. Consult a qualified healthcare professional about your own circumstances before acting on anything here.